](https://www.byfitgear.com/wp-content/uploads/2025/03/O1CN01xsdpN01o9PHuX53Be_1015865182-0-cib.jpg_.webp)
Loose rubber mats slipping around your gym floor? It’s not just annoying, it looks unprofessional and can even be a tripping hazard. You need a reliable way to keep them securely connected for a safe, seamless workout surface.
Joining rubber mats depends on the type: use specific rubber adhesives for a permanent bond with straight-edge mats, connect the built-in edges for interlocking tiles, or use professional methods like heat welding or specialized factory treatments (like BYFIT’s SmartFusion™) for large rubber rolls.
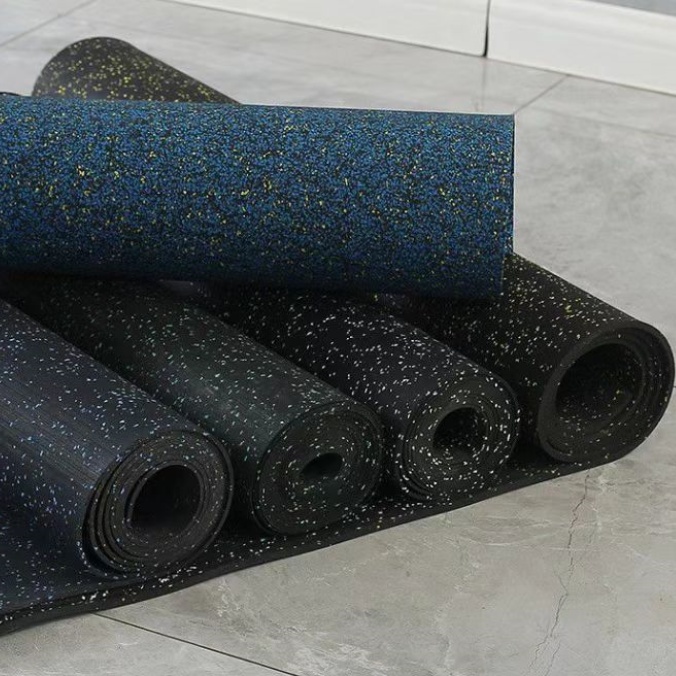
](https://www.byfitgear.com/wp-content/uploads/2025/03/different-types-of-rubber-gym-mats-needing-joining.jpg) Joining Rubber Mats
Joining Rubber Mats
Getting those mats joined properly isn’t just about looks; it’s about creating a stable, functional, and safe floor. Whether you’re dealing with a few standalone mats, interlocking tiles, or massive rolls covering a huge area, the joining method makes all the difference. Let’s break down the best ways to tackle each situation so you can achieve that perfect gym floor finish.
What is the best adhesive to permanently bond rubber gym mats?
You’ve laid out your mats, but they keep drifting apart, creating ugly gaps. Using the wrong glue can be a sticky mess, failing quickly or releasing nasty fumes. Finding the right adhesive ensures a truly permanent, safe bond.
For a permanent bond, polyurethane-based or two-part epoxy adhesives1 specifically formulated for rubber flooring2 are typically the best options. These offer strong, flexible, and durable adhesion. Always check the adhesive manufacturer’s compatibility3 with your specific rubber type.
](https://www.byfitgear.com/wp-content/uploads/2025/03/41PpMe1fcL._AC_UF8941000_QL80_.jpg) Rubber Flooring Adhesives
Rubber Flooring Adhesives
Selecting the right glue involves more than just grabbing any tube off the shelf. Rubber is a tricky material – it can expand and contract, and it needs an adhesive that can move with it while maintaining a death grip. Let’s look deeper into what makes an adhesive suitable for this job.
What types of adhesives work best for rubber?
Not all glues are created equal, especially when wrestling with rubber.
- Polyurethane Adhesives: These are often the go-to. They cure using moisture in the air or substrate and remain flexible after curing. This flexibility is key for rubber flooring, which might experience slight movement or temperature changes. They offer excellent bonding strength to rubber and common subfloors like concrete. Think of it like the suspension on a car – strong enough to hold things together but flexible enough to handle bumps (or in this case, expansion).
- Epoxy Adhesives: Usually coming in two parts that need mixing, epoxies create an incredibly strong, rigid bond. They are fantastic for situations demanding maximum durability. However, their rigidity might be less forgiving than polyurethane if there’s significant movement in the subfloor or rubber. Ensure you select an epoxy rated for rubber applications.
- Contact Cement: While sometimes used, contact cement typically creates a less permanent bond compared to polyurethane or epoxy. It requires application to both surfaces, letting them get tacky before pressing them together. It might work for temporary fixes or less demanding areas, but isn’t usually recommended for heavy-duty, permanent gym floor installations.
How should adhesive be applied correctly?
Just having the right glue isn’t enough; you need to apply it correctly.
- Surface Preparation: Cleanliness is critical! Both the mat edges and the subfloor (if gluing down) must be completely free of dust, grease, oil, and moisture. Think of it like painting – you wouldn’t paint over dirt, right? Same principle here.
- Follow Instructions: Read the adhesive manufacturer’s instructions carefully regarding temperature, humidity, application method (trowel size, bead size), and cure time. Deviating can lead to bond failure.
- Ventilation: Many strong adhesives release Volatile Organic Compounds (VOCs). Ensure good ventilation during application and curing for safety and to minimize lingering odors – something Sarah, the gym owner, would definitely care about.
Are there any downsides to using adhesives?
Adhesives are effective but have potential drawbacks:
- Permanence: Once glued, mats are difficult (often impossible) to remove without damage.
- Mess: Application can be messy if you’re not careful.
- Skill: Achieving a clean, strong seam requires some practice.
- Cost: High-quality rubber adhesives can be expensive, especially for large areas.
| Feature | Polyurethane Adhesive | Epoxy Adhesive | Contact Cement |
|---|---|---|---|
| Bond Strength | Very Strong | Extremely Strong | Moderate |
| Flexibility | Good | Low | Moderate |
| Permanence | High | Very High | Lower |
| Application | Typically single component | Usually two-part mix | Apply to both surfaces |
| Best Use Case | General purpose, permanent | Heavy-duty, permanent | Temporary, light use |
| VOCs | Can be high, check product | Can be high, check product | Often high |
For large commercial projects where adhesive seems like the main option, getting expert advice is key. At BYFIT, we understand the challenges. While we stand by quality adhesives for certain applications, for roll flooring, we’ve innovated beyond this. Our SmartFusion™ technology, applied in our factory, creates pre-fused edges, eliminating the need for on-site adhesives altogether for the seams.
How do you connect interlocking rubber floor tiles for a seamless gym floor?
Got a pile of interlocking tiles that look more like a jigsaw puzzle gone wrong? If not connected correctly, those edges can pop up, shift, or leave annoying gaps. You need them to lock together tightly for that smooth, unified floor surface.
Connect interlocking tiles4 by carefully aligning the puzzle or connector edges5 of adjacent tiles. Apply firm, even pressure6 (often with a rubber mallet) to push the edges together until they sit flush and securely locked. Start from a corner and work systematically across the floor.
](https://www.byfitgear.com/wp-content/uploads/2025/03/interlocking-tile-system.jpg) Interlocking Tile System
Interlocking Tile System
Interlocking tiles are popular for a reason – they seem like the flooring equivalent of building blocks, designed for easy installation. But ‘easy’ doesn’t mean ‘thoughtless’. Proper technique ensures they perform as intended, giving you that stable, seemingly seamless surface everyone wants. Let’s examine how these connections work and the best way to put them together.
How do interlocking systems function?
Most interlocking gym tiles use one of two main systems:
- Puzzle Edges: Just like a jigsaw puzzle, these tiles have tabs and slots that fit together. The key is ensuring the tabs are fully seated within the slots.
- Hidden Interlocks: Some tiles have connectors underneath or along the edges that aren’t as obvious. These often clip or slide together.
The design aims to create a mechanical connection that prevents tiles from sliding apart horizontally and minimizes vertical movement between tiles.
What are the steps for proper installation?
Achieving a great result involves a methodical approach:
- Prepare the Subfloor: Ensure the floor underneath is clean, dry, and level. Any significant bumps or dips can affect how the tiles lock together.
- Start in a Corner: Begin laying tiles from a corner of the room, usually working along the two walls. This provides a stable starting point.
- Align Carefully: Place the next tile adjacent to the first, carefully aligning the interlocking edges. Make sure they are oriented correctly – puzzle pieces won’t fit if they’re upside down or backward!
- Engage the Lock: Apply pressure to join the tiles. For puzzle edges, push down firmly along the seam. A rubber mallet can be helpful: tap gently along the seam to ensure the edges lock fully without damaging the tile. Don’t whack it like you’re driving a nail; use firm, controlled taps.
- Work Outwards: Continue adding tiles row by row or in sections, always ensuring each new tile locks securely with its neighbors on all connected sides. Check constantly that tiles are sitting flat and seams are tight.
- Cutting (If Necessary): You’ll likely need to cut tiles to fit against walls or obstacles. Use a sharp utility knife and a straight edge for clean cuts. Measure twice, cut once!
What are the pros and cons of interlocking systems?
Interlocking tiles offer distinct advantages and disadvantages:
| Feature | Interlocking Tiles | Adhesive-Joined Mats/Rolls |
|---|---|---|
| Installation | DIY-friendly, faster, no glue mess | Requires more skill, adhesive cost |
| Permanence | Semi-permanent, can be relocated | Permanent, difficult to remove |
| Seam Visibility | Seams are visible | Can be nearly invisible (esp. rolls) |
| Water Resistance | Liquid can seep through seams | Sealed seams prevent seepage |
| Cost | Often higher initial cost per sq/ft | Mat cost + adhesive cost |
| Portability | Easy to disassemble and move | Not portable |
Interlocking tiles are a fantastic solution for many, especially Sarah’s gym where flexibility might be needed, or for DIY installations. However, for large areas demanding a truly seamless, waterproof, and ultra-durable finish, like what David Lee might require for a major facility, other methods like professionally seamed rolls might be preferable.
Looking for quality interlocking tiles? BYFIT offers various patterns and thicknesses, ensuring a snug fit and durable performance. Check out our options at https://byfitgear.com/.
What are the professional methods for seaming rubber flooring rolls together?
Laying down large rolls of rubber flooring gives a great look, but getting those seams perfect is crucial. A poorly done seam looks terrible, can catch toes, and allows dirt and moisture underneath. Professionals use specific techniques for strong, almost invisible joins.
Professional methods for seaming rubber rolls primarily involve heat welding7, where edges are melted together with a welding rod, or precise double-cutting8 followed by specialized seam sealer/adhesive. Advanced factory techniques like BYFIT’s SmartFusion™ pre-fuse edges for simpler on-site joining.
 Seaming Rubber Rolls
When you’re dealing with rubber rolls, especially in large commercial spaces like fitness centers or institutional gyms, the seams need to be absolutely perfect. They must be durable enough to withstand heavy traffic and equipment, waterproof to handle spills and cleaning, and as inconspicuous as possible for aesthetics and safety. This isn’t typically a DIY job; it requires skill and the right tools.
What is traditional heat welding?
This is a common method for materials like PVC and linoleum, and sometimes adapted for rubber.
- Preparation: The rubber rolls are laid out with edges overlapping slightly or perfectly butted together. A groove might be cut along the seam line.
- Welding: A specialized heat gun with a nozzle directs hot air into the seam, melting the rubber edges slightly. Simultaneously, a rubber or thermoplastic welding rod is fed into the seam. The heat fuses the rod and the mat edges together.
- Skiving: Once cooled, any excess welding rod material protruding above the surface is carefully trimmed off (skived) with a special knife, leaving a smooth, flush seam.
- Pros: Creates a very strong, waterproof, monolithic seam.
- Cons: Requires specialized tools, significant skill and practice, can be slow, and the seam line, while flush, is often visible. Heat settings must be precise to avoid burning the rubber.
How does double-cut seaming9 work?
This method focuses on creating perfectly matched edges for gluing.
- Overlap: The two rolls of rubber flooring are laid with one edge slightly overlapping the other (typically by an inch or two).
- Cut: Using a very sharp utility knife or specialized cutter and a straight edge, a single cut is made through both layers of the overlapped rubber along the desired seam line.
- Remove Waste: The trimmed-off strip from the top layer and the underlying strip from the bottom layer are removed.
- Adhere: The result is two edges that match perfectly. These edges are then secured to the subfloor and/or to each other using a recommended rubber adhesive or seam sealer applied carefully into the seam.
- Pros: Can create very tight, almost invisible seams if done expertly. Doesn’t require heat welding equipment.
- Cons: Requires extreme precision in cutting – any wobble creates a gap. Still relies on adhesive/sealer for bond strength and water resistance. Can be time-consuming.
What is the BYFIT Innovation: SmartFusion™?
Recognizing the challenges and limitations of traditional methods (time, skill, potential for error, reliance on adhesives), we at BYFIT developed SmartFusion™10. This isn’t an on-site technique; it’s a proprietary pre-fusion edge treatment technology applied in our factory.
- How it Works: We use a factory-controlled heat-pressure process to treat the edges of the rubber rolls before they even ship. This creates edges designed to fuse together seamlessly during installation with minimal effort – primarily just careful alignment. Compared to existing methods, SmartFusion™ is more eco-friendly than adhesives, results in a flatter seam than interlocks, and allows for faster installation than in-field welding.
- Benefits for B2B Buyers:
- Eliminates On-Site Adhesives/Welding: No messy glues, no fumes, no specialized welding tools needed for the seams themselves.
- Faster Installation: Significantly speeds up the process for large B2B projects, saving labor costs – crucial for importers like Alex Smith or large buyers like David Lee.
- Superior Seam Integrity: Creates an incredibly strong, molecular-level bond for enhanced durability.
- Premium Seamless Look: Results in a flatter, more consistent, and less visible seam compared to manual methods.
- Quality Control: Factory process ensures consistency edge-to-edge, roll-to-roll, direct from our 20-line facility.
This technology is exclusively available from BYFIT in China. It empowers our clients to install professional-grade rubber flooring faster, with stronger seam integrity and a premium seamless look — enhancing both cost-efficiency and resale value for distributors and gym operators.
| Feature | Heat Welding | Double-Cut Seaming | BYFIT SmartFusion™ |
|---|---|---|---|
| Installation Speed | Slow | Moderate | Fast |
| Seam Strength | Very Strong | Strong (depends on adhesive) | Extremely Strong (fused) |
| Appearance | Seam visible, can be colored | Very tight, potentially invisible | Near seamless, consistent |
| Skill Required | High | High | Low (alignment focus) |
| On-Site Process | Heat gun, welding rod, skiving | Precision cutting, adhesive | Alignment, securing roll |
| Environmental Impact | Energy use, potential fumes | Adhesive VOCs, waste strips | Minimal on-site impact |
| Best For | Permanent, waterproof seal | Achieving tight visual seams | Speed, quality, large projects |
Conclusion
Effectively join rubber mats using adhesives for permanent bonds, locking systems for tiles, or pro methods like welding and BYFIT’s SmartFusion™ for seamless rolls, depending on your specific needs.
-
Explore this link to understand why these adhesives are ideal for rubber flooring, ensuring a strong and durable bond. ↩
-
Discover the best adhesives for rubber flooring to ensure a long-lasting and safe installation. ↩
-
Learn how to verify adhesive compatibility to avoid issues and ensure a successful flooring project. ↩
-
Explore this link to learn expert tips and techniques for a flawless interlocking tile installation, ensuring a perfect fit and finish. ↩
-
Understanding how these edges function can help you achieve a seamless floor. Discover more about their design and installation. ↩
-
Learn why applying the right pressure is crucial for a successful flooring project, preventing future issues like gaps or shifting. ↩
-
Understanding heat welding can help you achieve seamless and durable rubber flooring installations. ↩
-
Learning about double-cutting techniques can enhance your skills in creating flawless seams in rubber flooring. ↩
-
Learn about double-cut seaming, a precise method for creating tight seams in rubber flooring without heat welding. ↩
-
Explore how SmartFusion™ revolutionizes rubber flooring installation with faster, eco-friendly methods and superior seam integrity. ↩