
](https://www.byfitgear.com/wp-content/uploads/2025/03/Gym-Flooring-1687195401207.png)
Imagine covering a vast space, like a warehouse, with gym flooring. It seems like a massive task, right? The wrong approach can lead to a mess of glue, uneven tiles, and a whole lot of frustration.
The easiest way to install rubber gym flooring tiles in bulk is using interlocking tiles. These tiles fit together like puzzle pieces, eliminating the need for adhesives and significantly reducing installation time. This also minimizes mess and makes it easy to replace sections if needed.
](https://www.byfitgear.com/wp-content/uploads/2025/03/rubber-flooring-for-gym.jpeg) Interlocking Tiles
Interlocking Tiles
It’s like building with giant LEGOs. You snap them together, and you’re done. But just choosing the right type is half the battle, let’s see the other key to a flawless gym floor.
What is the Best Flooring for a Wet Basement?
Picture a basement that always seems damp. You try to keep it dry, but moisture keeps creeping in. Now, imagine putting down flooring that traps that moisture. That’s a recipe for mold and a ruined floor.
*The best flooring for a wet basement is rubber. Specifically, choose rubber flooring tiles1 or rolls designed for wet areas. They’re non-porous2, meaning they won’t absorb water, and many have built-in drainage3 to allow airflow and prevent moisture buildup.
](https://www.byfitgear.com/wp-content/uploads/2025/03/Person-slipping-on-a-wet-rubber-floor.jpg) Wet Basement Solution
Wet Basement Solution
Think of it like choosing rain boots over sneakers on a rainy day. One keeps you dry, and the other leaves you with soggy, uncomfortable feet. Let’s take a closer look at the differences:
Types of Basement Flooring.
| Flooring Type | Water Resistance | Durability | Comfort | Maintenance | Cost |
|---|---|---|---|---|---|
| Rubber (Tiles/Rolls)4 | Excellent | High | Good | Low | Moderate |
| Epoxy Coating5 | Excellent | High | Low | Low | Moderate |
| Vinyl (Sheet/Tile) | Good | Moderate | Fair | Moderate | Low |
| Ceramic Tile | Excellent | High | Low | Moderate | High |
| Engineered Wood6 | Poor | Moderate | Good | High | High |
Rubber stands out because it ticks all the boxes for a wet basement. It won’t absorb water, it’s tough, it’s reasonably comfortable underfoot, and it’s easy to clean. Other options like epoxy are also water-resistant, but they’re hard and cold. Vinyl can work, but it’s not as durable. Engineered wood is a definite no-go in a damp environment.BYFIT —Your Trusted Partner for Gym Rubber Flooring. Contact us to learn how our gym rubber floors can make your basements safer. [email protected]
What Tools Are Needed to Install Rubber Gym Flooring Tiles?
It’s like baking a cake. You wouldn’t just throw the ingredients together and hope for the best, right? You need the right tools – measuring cups, mixing bowls, a whisk – to get the job done correctly. Installing gym flooring is similar.
To install rubber gym flooring tiles7, you’ll need a few essential tools8: a tape measure, a utility knife, a straight edge, a rubber mallet, and chalk. These help you measure, cut, align, and secure the tiles for a professional-looking finish9.
](https://www.byfitgear.com/wp-content/uploads/2025/03/rubber-flooring-install-essential-tools-.jpg) Essential Tools
Essential Tools
But it’s not just about having the tools. It’s about knowing how to use them effectively. Let’s break it down:
Tool Breakdown and Usage.
| Tool | Purpose | How to Use |
|---|---|---|
| Tape Measure | Accurately measure the area to be covered and the dimensions of the tiles. | Measure the length and width of the room, and double-check your measurements before cutting any tiles. |
| Utility Knife | Cut the rubber tiles to fit around corners, edges, and obstacles. | Use a sharp blade and a straight edge for clean, precise cuts. Score the tile multiple times rather than trying to cut through in one pass. |
| Straight Edge | Ensure straight cuts and lines when marking and cutting tiles. | Use a metal straight edge (like a T-square) for accuracy. Hold it firmly against the tile while scoring with the utility knife. |
| Rubber Mallet | Tap tiles into place, ensuring a snug fit without damaging them. | Gently tap the tiles, especially interlocking ones, to secure them together. Avoid excessive force, which could damage the edges. |
| Chalk | Mark guidelines on the floor for tile placement and alignment. | Snap chalk lines to create a grid that will help you keep the tiles straight and evenly spaced. |
| Knee Pads(Optional) | Provide comfort. | Wear comfortable knee pads. |
Having these tools and using them correctly will make the installation process smoother and the final result much more professional.
BYFIT —Your Trusted Partner for Gym Rubber Flooring. Contact us to learn how our gym rubber floors can be the answer to your needs. [email protected]
How Do I Cut Rubber Gym Flooring Tiles for a Perfect Fit?
Imagine trying to fit a square peg into a round hole. It’s just not going to work, right? Similarly, if you don’t cut your gym flooring tiles precisely, you’ll end up with gaps, uneven edges, and a messy-looking floor.
To cut rubber gym flooring tiles for a perfect fit, use a sharp utility knife10 and a straight edge. Measure carefully, mark your cut line, and score the tile multiple times with the knife before cutting all the way through. This ensures a clean, accurate cut.
](https://www.byfitgear.com/wp-content/uploads/2025/03/rubber-cut.jpg) Precise Cutting
Precise Cutting
It’s like tailoring a suit. You measure twice, cut once. Here’s a step-by-step guide:
Steps for Cutting Rubber Gym Flooring Tiles.
- Measure: Use your tape measure to determine the exact size of the cut needed. Double-check your measurements!
- Mark: Use chalk and your straight edge to draw a clear line on the tile where you need to cut.
- Score: Place the straight edge along the marked line. Use your utility knife to lightly score the tile along the line. Don’t try to cut all the way through on the first pass.
- Repeat: Score the tile again along the same line, applying slightly more pressure. Repeat this several times.
- Snap: Once you’ve scored the tile deeply enough, you should be able to bend it along the score line and snap it cleanly in two.
- Use a fresh, sharp blade in your utility knife. A dull blade will make the job harder and can lead to ragged edges.
- For thicker tiles, you might need to use a heavy-duty utility knife11 or even a power saw (like a jigsaw with a fine-tooth blade). If using a power saw, be sure to wear safety glasses and follow all safety precautions.
With practice and patience, you’ll be able to cut your gym flooring tiles like a pro.
How to Maintain Gym Flooring After Installation?
Imagine buying a brand-new car. You wouldn’t just drive it and never wash it, change the oil, or check the tires, right? Your gym flooring is the same. It needs regular care to stay in top condition.
To maintain gym flooring after installation, regularly sweep or vacuum to remove dirt and debris. Mop with a pH-neutral cleaner12 and water, and address spills immediately. Avoid harsh chemicals or abrasive cleaners, which can damage the rubber.
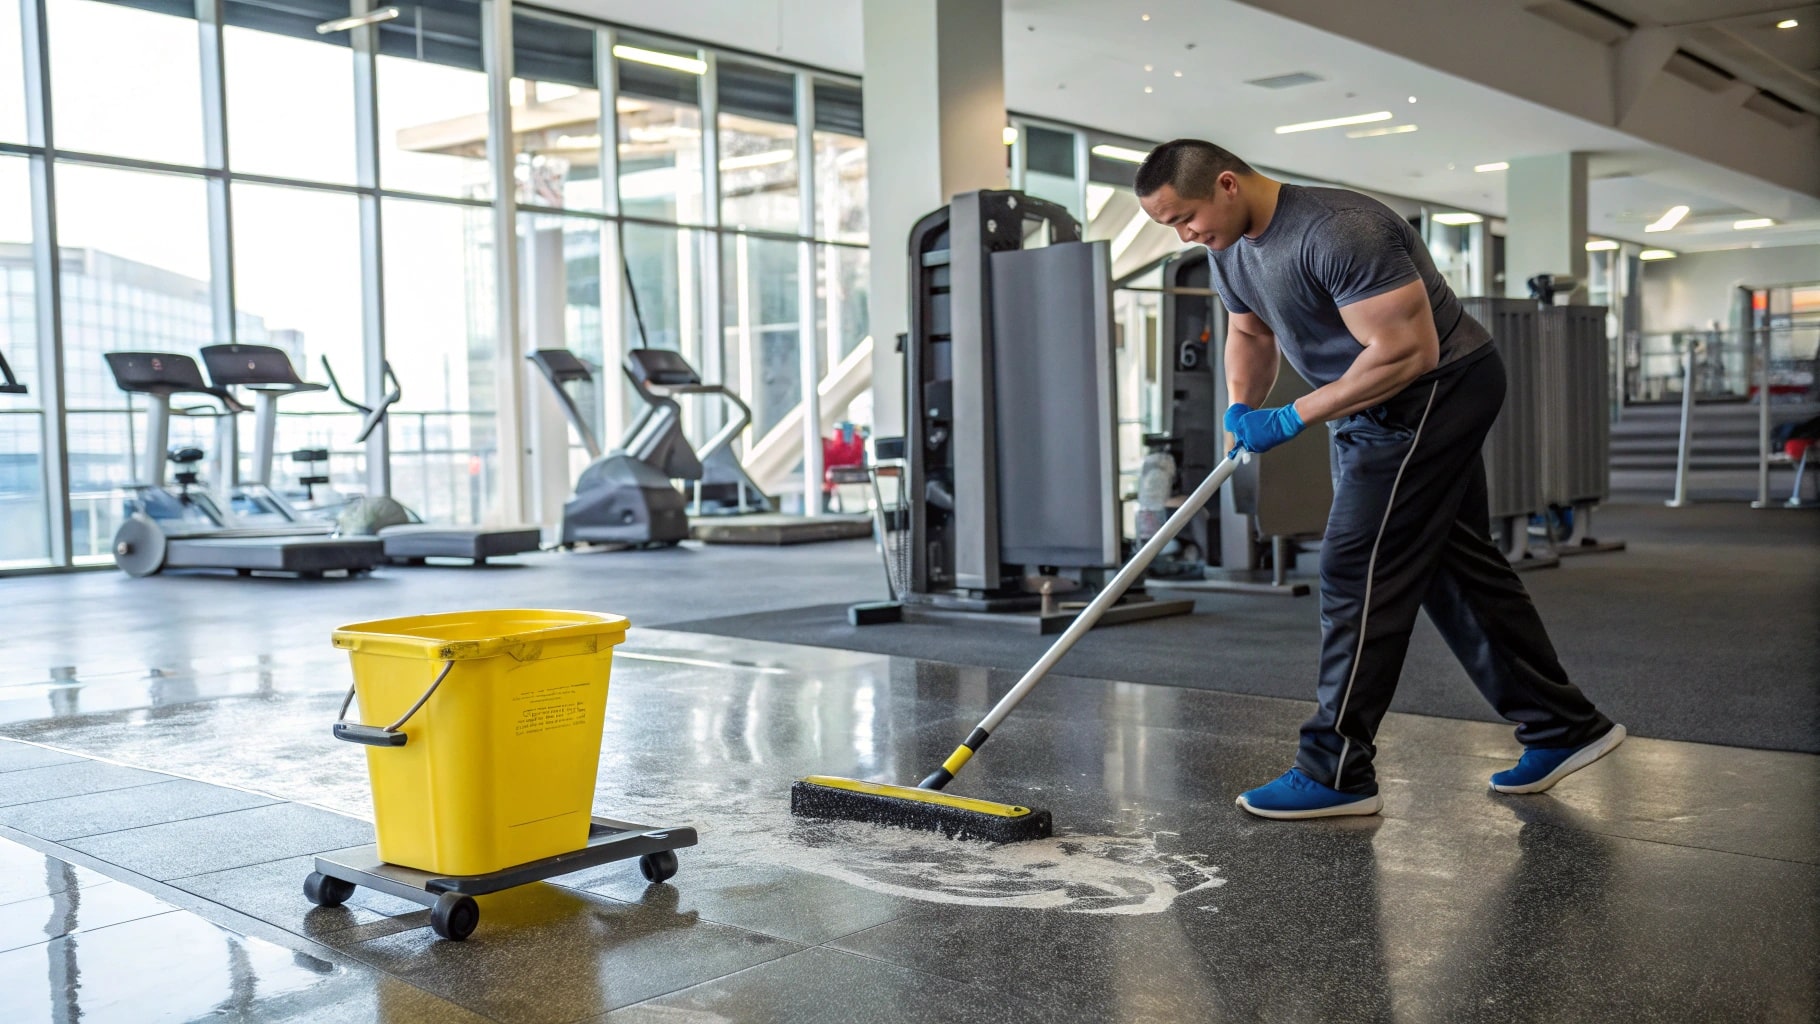 Regular Maintenance
It’s like brushing your teeth. You do it every day to prevent problems down the road. Let’s go a bit deeper:
Gym Flooring Maintenance Schedule.
| Frequency | Task | Why |
|---|---|---|
| Daily | Sweep or vacuum | Removes loose dirt, dust, and debris that can scratch the surface and become ground in. |
| Weekly | Damp mop with pH-neutral cleaner and water | Cleans the surface without damaging the rubber. Avoid harsh chemicals, which can cause discoloration or degradation. |
| Monthly | Inspect for damage | Check for cracks, tears, or loose tiles. Address any issues promptly to prevent them from worsening. |
| Quarterly | Deep clean (if needed) | For high-traffic areas or stubborn stains, use a slightly stronger cleaner specifically designed for rubber flooring. Follow the manufacturer’s instructions. |
Following this simple maintenance schedule will keep your gym flooring looking great and performing well for years to come.
Conclusion
Installing and maintaining rubber gym flooring tiles in bulk doesn’t have to be overwhelming. By choosing interlocking tiles, using the right tools, cutting precisely, and following a regular maintenance schedule, you can create a durable, safe, and attractive gym space.
-
Explore the advantages of rubber flooring tiles, including moisture resistance and durability, perfect for wet basements. ↩
-
Learn why non-porous materials are essential in preventing moisture damage and mold growth in basements. ↩
-
Discover how built-in drainage systems in flooring can effectively manage moisture and enhance air circulation. ↩
-
Explore the advantages of Rubber flooring for basements, including water resistance and comfort, to make an informed choice. ↩
-
Learn about the performance and benefits of Epoxy Coating for basements, especially in terms of water resistance and durability. ↩
-
Understand the drawbacks of Engineered Wood in wet environments to avoid costly mistakes in your flooring choice. ↩
-
Explore this resource to learn expert tips and techniques for a flawless installation of rubber gym flooring tiles. ↩
-
This link will provide you with a comprehensive list of tools necessary for a successful gym flooring installation. ↩
-
Discover techniques and tips to ensure your flooring installation looks polished and professional. ↩
-
Explore this link to find top-rated utility knives that ensure clean cuts for your rubber flooring projects. ↩
-
Learn about heavy-duty utility knives and their applications for tougher cutting tasks, ensuring precision and safety. ↩
-
Understanding pH-neutral cleaners can help you choose the right products for maintaining your gym flooring without causing damage. ↩